Analyzing Generated Dimensions

| Before you begin, make sure you customized the following settings:
Dimension generation:
|
||||||||||||||
| This task will show you how to analyze generated dimensions via the Generated Dimension Analysis dialog box. | ||||||||||||||
| Open the GenDrafting_front_view.CATDrawing
and the GenDrafting_part.CATPart
documents.
Tile your windows horizontally to view both your drawing and the related part. To do this, select Window -> Tile Horizontally from the menu bar. |
||||||||||||||
| 1. Click the Generating Dimensions icon |
||||||||||||||

|

|
|||||||||||||
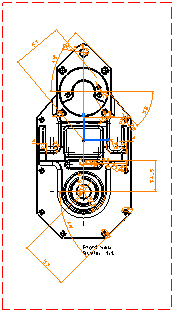
| The dimensions are generated on
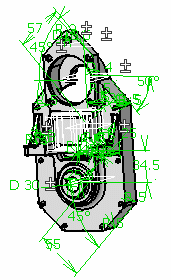
the view. You can select a dimension in the drawing to highlight the corresponding constraint in the 3D, and
vice-versa.
|
||||||||||||||
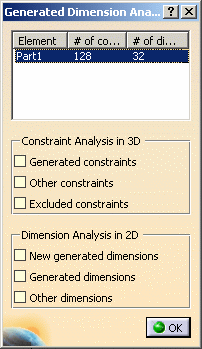
The Generated Dimension Analysis dialog box is automatically displayed.
|
||||||||||||||
The Generated Dimension Analysis dialog box displays the number of constraints available in the 3D, as well as the number of dimensions generated on the drawing, for each part or product in the drawing (in this case, there is only one part). You can use the options in this dialog box to highlight the dimensions in the drafting sheet as well as the associated 3D constraints you can visualize in your Part or Product document. Let's describe the dialog box more precisely: Constraint Analysis in 3D These options let you highlight specific constraints on the 3D part.
Dimension Analysis in 2D These options let you highlight specific dimensions on the drawing.
|
||||||||||||||
| 2. Check the Generated constraints and Generated Dimensions options. The generated dimensions are highlighted on the drawing, and the constraints associated with the generated dimensions are highlighted on the 3D part. | ||||||||||||||

|

|
|||||||||||||
|
2. Click OK to close the dialog box.
|
||||||||||||||
|
|
|||||||||||||
|
||||||||||||||


