 Importing Forces
| Importing
forces from a text file means importing and
mapping force data from a text or excel file. This force data can be
either force extrapolated on the nodes of the closest element or force
directly applied on the associated node. This allows transferring light
data.
|
|||||||||||
This task shows you how to import forces from a .xls
file:
|
|||||||||||
|
|||||||||||
| 1. Click the Imported
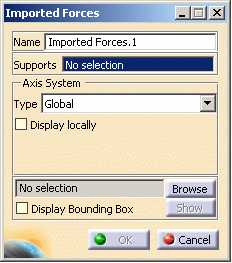
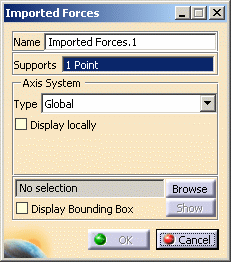
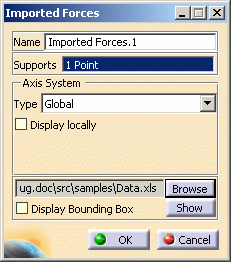
Force icon The Imported Forces dialog box is displayed.
|
|||||||||||
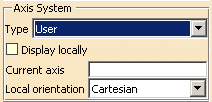
The Axis System Type combo box allows you to
choose between Global and User Axis systems:
|
|||||||||||
On a Surface |
|||||||||||
| In this particular case, and as mentioned above open sample53.CATAnalysis.
Before You Begin:
|
|||||||||||
|
2. Select the surface as the Support on which you want to import the Force.
|
|||||||||||
|
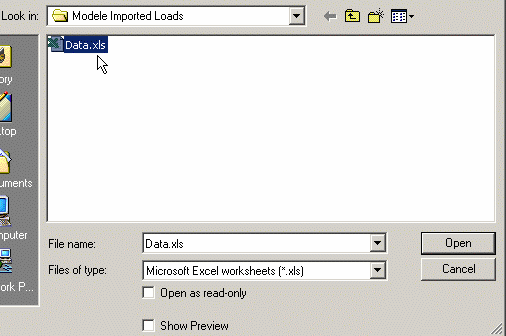
3. Click the Browse button in the Imported Forces dialog box to select the file to be imported. The File Selection dialog box appears to let you choose the file to be imported. In this particular case, select Data.xls file.
4. Once the File name has been selected, click Open in the File Selection dialog box. The Imported Forces dialog box is updated.
5. If needed, click the Show button to display the Imported Table box corresponding to the selected file data. In this particular case, the imported table appears as shown here:
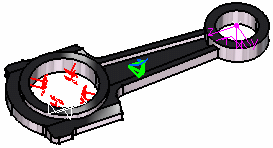
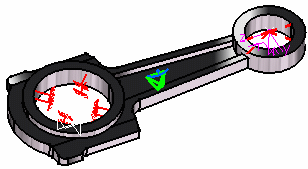
6. Click Close in the Imported Table box. 7. In this particular case, we also decided to activate the Display bounding box (as shown in the dialog box above). The model appears as shown here: 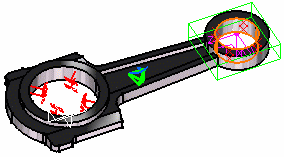
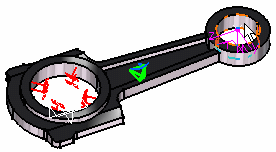
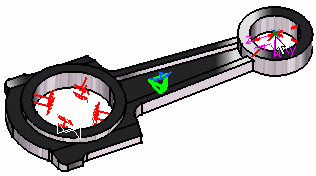
8. Click OK in the Imported Forces dialog box. The resulting model appears as shown here:
The Imported Forces.1 feature is displayed in the specification tree.
|
|||||||||||
| For each point in the data file, the
corresponding force is distributed on the three closest nodes of the
selected support.
If the point coordinates correspond to a node, the force is directly applied on it.
|
|||||||||||
|
|
On a Virtual PartIn this particular case, and as mentioned above open sample54.CATAnalysis.
Before You Begin:
|
||||||||||
| 2. Select the Point as the Support on which
you want to import the Force.
The Imported Forces dialog box now appears as shown here:
3. Click the Browse button to select the file to be imported. The File Selection dialog box appears to let you choose the file to be imported. In this particular case, select Data.xls file.
4. Once the File name has been selected, click Open in the File Selection dialog box. The Imported dialog box is updated.
5. If needed, click the Show button to display the Imported Table box corresponding to the selected file data. In this particular case, the imported table appears as shown here:
6. Click Close in the Imported Table box. 7. Click OK in the Imported Forces dialog box. The model appears as shown here:  |
|||||||||||
| Note that for each point in the data file, the corresponding force is directly applied on the closest point handler of a virtual part. | |||||||||||
|
|
|||||||||||
