 |
The task below illustrates how to interactively apply a loop to an existing document.
To know more about the loop, see Working with
the Loop Feature.
|
 |
Loops can drive the creation, modification and deletion of sets of
features
 | They are stored in the resulting model as a feature. A change in
their specifications will drive the expected modification in the model.
 | Loops can be instantiated through a PowerCopy or a UDF implying
a significant ease of use. |
|
|
 |
Before creating a loop in a CATPart document, make sure that the
Manual input option is unchecked in the Part Number field of the Tools->Options->Infrastructure->Product
Structure->Product Structure tab. |
 |
-
Create a rectangular pad with 4 holes.
-
Access the Knowledge Advisor workbench then click the
Loop icon ( ). The
Loop window is displayed. ). The
Loop window is displayed.
-
If need be, select the Definition tab. Set the context to
Iterator.
 |
 | Constant Context: The context is
one portion of the document. |
 | Iterator:
The Iterator may be based on a constant number or on a
list of features. |
|
-
Click the Edit List button to specify
to which objects the action (Diameter
= 3mm;) is going to be applied. The List Edition dialog box is
displayed.
-
Select one of the holes in the specification tree or in the geometry area, then click
Add in the List Edition dialog box.
-
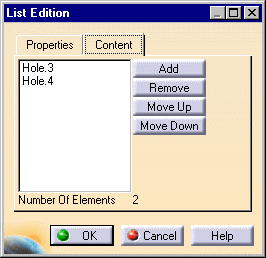
Repeat this operation for two or three holes for
example. Your dialog box looks now something like this:
-
Click OK. You are back to the
Loop window. Enter the formula below in the edition box:
Diameter = 3mm;
-
Click
OK to
confirm your loop definition and apply it to the document and exit the
Loop window.
-
If need be, update the document. A Loop object is created in the
specification tree below the Relations node. The diameter of the holes you have selected
are reset to the value specified. Keep your document open.
-
Access the Part Design workbench, and insert a new body into your document. To do so, select
the Insert->Body command.
| See the Part Design User's Guide
to know more about how to insert a new body into your document. |
Re-access the Knowledge Advisor workbench then click the
Loop icon ( ). ).
In the Definition tab of the
Loop dialog box, select the
Iterator context and enter the $Pad$ isa Pad {} action.
 |
Note that to access arguments, you have to use
the $ symbol.
|
Click the Edit List button.
Add the PartBody
feature as well as the body you have just created, then click OK in the
List Edition
dialog box. You are back to the initial window.
In the Arguments tab
of the Loop window, specify the Pad argument and assign a value to
this variable (for example pad2). To do this, proceed as follows:
|
|
Click the Arguments tab. |
|
|
Fill in the Argument (Pad) and the Value
(Pad2) fields. |
|
|
Click the  button.
 |
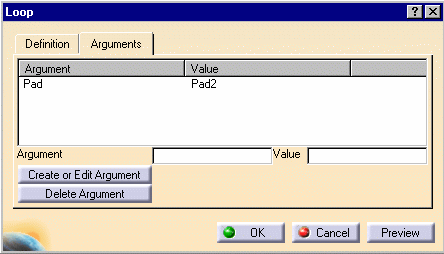
The Loop window looks like
the one below:
Click OK to add the Pad argument definition to the loop. You are back to
the initial dialog box.
| 16. Click OK to add the new loop to the document. Two pads with Pad2 names
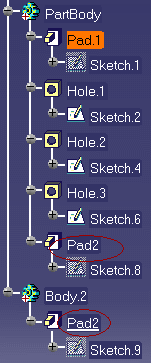
are created, one below the PartBody, the other below the added body. |
 |
|

|
![]()


