Reading Clash Command Results
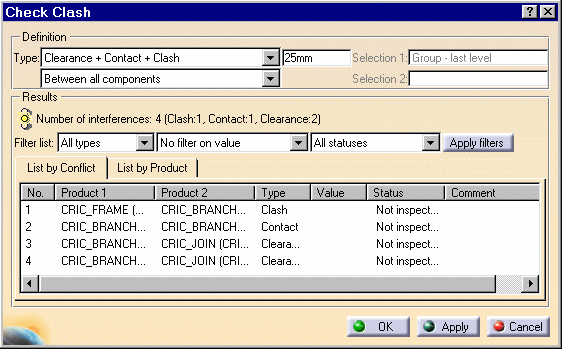
| This task explains how to read the global results in the Check Clash dialog box and browse through them in the Preview window. | ||||||||||||
| Open the AnalyzingAssembly01.CATProduct document. | ||||||||||||
| 1. | Click the Clash
The Check Clash dialog box expands to show the results. |
|||||||||||
 |
||||||||||||
| The
dialog box identifies the number of interferences detected along with the
type: 4 interferences have been detected.
Status lights are color-coded as follows:
Interference results are presented in two different ways in the dialog box:
|
||||||||||||
| 2. | Select
the first conflict in the list, that is a clash, to run a detailed
computation.
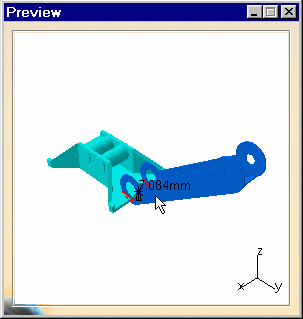
A Preview window appears showing the products in conflict only. |
|||||||||||
|
|
||||||||||||
| The minimum distance is specified in the dialog box and both the minimum distance and red intersection curves identify clashing products separated by less than the specified clearance distance of 25mm are displayed in the geometry area. | ||||||||||||
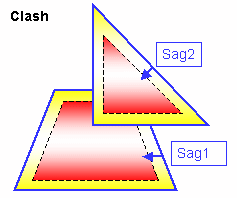
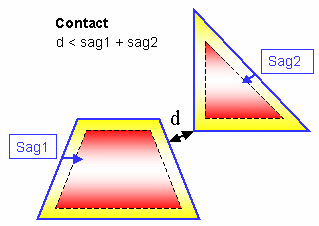
Color Coding for Conflicts
|
||||||||||||
| If necessary, pan, zoom and/or rotate in the Preview window to visualize the interference better. | ||||||||||||
| 3. | Select
contact and clearances in turn in the List by Conflict tab to run a detailed
computation.
As you select them, the Value and Status columns in the Check Clash dialog box, and the Preview window are updated. |
|||||||||||
| 4. | You
can also view the selected interference in a
dedicated viewer. To do so, click the Results window |
|||||||||||
Filtering the Display in the Dialog Box |
||||||||||||
| You can filter the display of results in tabs by: | ||||||||||||
|
||||||||||||
| 5. | Set Clearance as the filter type. | |||||||||||
| 6. | Click Apply filters to update the display. | |||||||||||
| 7. | To
change the status of an inspected conflict, click the status field of the
appropriate conflict.
The conflict status changes from relevant to irrelevant and vice-versa depending on the initial value. |
|||||||||||
|
|
||||||||||||
| 8. | You can also add comments to selected conflicts:
Click the Comment field.
The Comment dialog box appears. |
|||||||||||
|
|
||||||||||||
| 9. | Enter your comment, for example "Test" and click OK. | |||||||||||
| 10. | Click the List by Product tab to display conflicts associated with products. | |||||||||||
|
|
||||||||||||
| Results are organized by product in the List by Product tab. There may be more than one conflict per product. | ||||||||||||
|
|
||||||||||||


