Modifying the Dimension Type
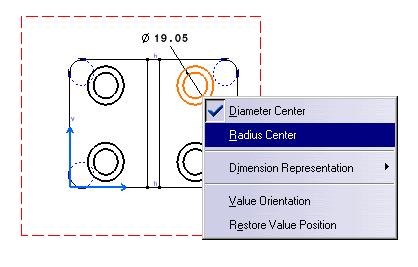
| This task will show you how to modify the dimension type as you create a dimension. In other words, you modify the dimension attributes. In this particular example, we will apply a Radius Center dimension type to a hole. | |||||
| Open the Brackets_views02.CATDrawing document. Create a diameter dimension, for example. | |||||
| 1. If needed, modify
the dimensions location by dragging it with the cursor.
2. Right-click the dimension. 3. Select the required dimension type from the displayed contextual menu. For example, Radius Center.
|
|||||
| The diameter dimension is automatically turned
into a radius dimension.
4. Click the drawing window to validate the dimension creation and, if needed, modify the dimension location.
|
|||||
|
|||||
|
|||||


