Creating/Modifying a Table
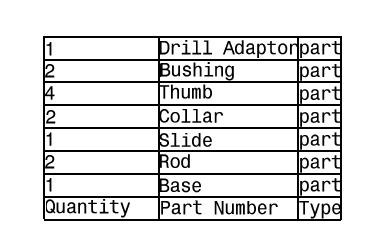
| This task shows you how to create and edit a table. In this table, you can add text, insert columns, rows, merges cells, invert lines, invert columns, switch lines and columns, and insert views. You can also split a table, import a table, and insert a view in a table. Choose a task:
Creating a table |
|||||||||||||||||||||||
| Create a new sheet and a new view. | |||||||||||||||||||||||
| 1. Click the icon |
|||||||||||||||||||||||
| 2. Click a point in the drawing to choose the table position. | |||||||||||||||||||||||
| The table cannot be associative, do not select an element in the drawing to make the table associative. | |||||||||||||||||||||||
| 3. The following panel
allows you to set the number of columns and rows you want for the table.
|
|||||||||||||||||||||||
|
|||||||||||||||||||||||
| 4. Click ok to validate the creation. | |||||||||||||||||||||||
Editing and modifying a table |
|||||||||||||||||||||||
| 5. Click on the table to select it and drag it to another position. | |||||||||||||||||||||||
6. Double-click the
table to edit it:
|
|||||||||||||||||||||||
| When the table is in edition mode, you cannot move it anymore. | |||||||||||||||||||||||
|
7. Right-click on the corner of the frame around the table to access the general contextual menu.
This contextual menu allows you to:
8. Choose Invert rows in
the contextual menu. 9. Choose Invert Columns in the contextual menu. Columns are inverted.
10. Select Invert Columns / Rows in the contextual menu. Rows and Columns are inverted:
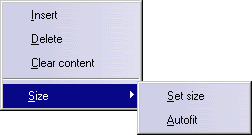
11. Select a column and right-click to get the contextual menu, it allows you to:
Choose to autofit the column size, the following dialog box appears:
Set the column width to a new value value and click OK to validate. The same functionalities are available for rows. 12. Select two cells and right-click them, then choose Merge in the contextual menu. 13. Then select the new cell formed by the two cells you have merged and choose Unmerge to split them in two cells again. 14. Double-click on the text of a cell. The Text Editor appears: modify the text and click OK to validate.
15. To choose vertical and
horizontal text alignment, use the Anchor point tool
|
|||||||||||||||||||||||
Splitting a table |
|||||||||||||||||||||||
| Open the Split_tables.CATDrawing
document. It contains a table that you will split into several tables.
|
|||||||||||||||||||||||
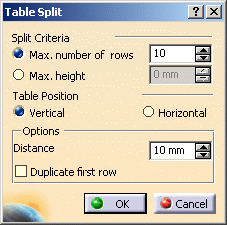
| 1. Right-click the table and choose Split Table from the contextual menu. The Table Split dialog box appears. | |||||||||||||||||||||||
|
|||||||||||||||||||||||
It contains the following options:
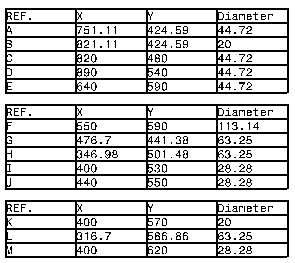
2. Select Max. number of rows, and enter 5 in the corresponding field. 3. Select Vertical. 4. In the Distance field, type 5 mm. 5. Select Duplicate first line. 6. Click OK. The table is split into several tables, according to the criteria you specified. |
|||||||||||||||||||||||
|
|||||||||||||||||||||||
Importing a table |
|||||||||||||||||||||||
| You can import a table (only .csv). | |||||||||||||||||||||||
| 1. Click the Import
Table icon
|
|||||||||||||||||||||||
Inserting a view a in table |
|||||||||||||||||||||||
| Open the GenDrafting_part.CATDrawing
file. Create a table in the front views.
|
|||||||||||||||||||||||
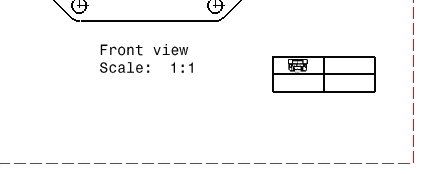
| 1. Double-click on the
table to edit it and right-click in the cell you want to fill. Select Insert
Object.
|
|||||||||||||||||||||||
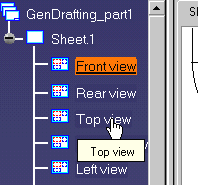
| 2. Choose the view you
want to insert by clicking the view in the drawing or in the tree. Choose the
Top view:
The top view is inserted in the table, and it is resized so as to fit the cell. You can resize the cell if you want to enlarge the view in the table.
|
|||||||||||||||||||||||
|
|||||||||||||||||||||||
|
|||||||||||||||||||||||


