Editing Annotation Font Properties
| This task explains how to access and, if needed, edit annotation font properties. | ||||||||||||||||
| Open the Brackets_views03.CATDrawing document. Create a free text, for example. | ||||||||||||||||
| 1.
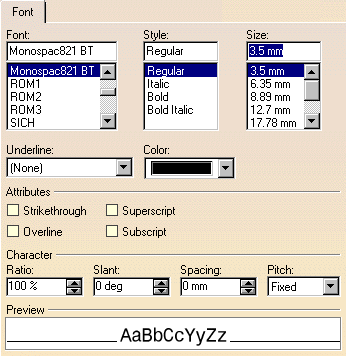
Double-click the text to switch it to edit mode. 2. Select the whole text (you can also select only part of the text) and then select the Edit-> Properties command. You can also right-click on the selected text and then choose Properties from the contextual menu. 3. In the Properties dialog box that appears, click the Font tab. The associated panel is displayed. |
||||||||||||||||
|
|
||||||||||||||||
| You can either underline or overline a text, but you cannot do both. | ||||||||||||||||
|
||||||||||||||||
| The Slant and Pitch options are available only for stroke fonts. | ||||||||||||||||
| Clicking the More button will display extra options, if any are available. | ||||||||||||||||
|
4. Modify the available options as required. 5. Click OK. For more information on font properties, please refer to the Infrastructure User's guide. |
||||||||||||||||
Changing Character Ratio and SpacingIn this task, you will learn how to change the character ratio and spacing of a portion of text, but it is also possible to change these for a whole text. |
||||||||||||||||
| Create a free text. | ||||||||||||||||
| 1. Double-click the text to switch it to edit mode. | ||||||||||||||||
|
2. Select a portion of text and right-click it. |
 |
|||||||||||||||
| 3. Click Properties in the menu that appears. The Properties dialog box appears. | ||||||||||||||||
| 4. Click the
Font tab.
5. In the Character area, increase or decrease the value in the Ratio field to change the character ratio.
5. Modify the value in the Spacing field to change the character spacing. |
||||||||||||||||
|
6. Click OK to validate your changes. The text is updated. |
 |
|||||||||||||||
Making Text Superscript or SubscriptIn this task, you will learn how to make a text superscript, how to make a text subscript, and how to specify their position. |
||||||||||||||||
| Create a free text. | ||||||||||||||||
| 1.
Double-click the text to switch it to edit mode.
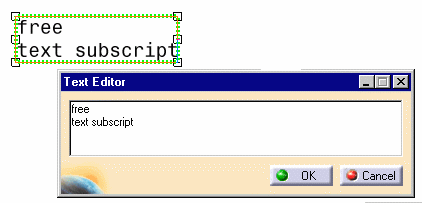
2. Type a text, "subscript" for example, after the text you created previously.
|
||||||||||||||||
|
3. Select the piece of text you just typed and right-click it. |
 |
|||||||||||||||
|
4. Click Properties in the menu that appears. The Properties dialog box appears. |
||||||||||||||||
| 5. Click the
Font tab.
6. In the Attributes area, select the Subscript check box.
7. Click OK to validate your changes. The selected text is made subscript. 8. Now type another text, "superscript" for example, after the existing text. For the moment, the new text takes on the properties of the subscript text in front of it. |
||||||||||||||||
|
9. Select the piece of text you just typed and right-click it. |
 |
|||||||||||||||
| 10 Repeat steps 4 and 5. | ||||||||||||||||
|
11. In the Attributes area, select the Superscript check box (instead of Superscript) and click OK. The selected text is made superscript. |
 |
|||||||||||||||
| 12.
For the purpose of this exercise, you will now align the subscript and
superscript texts and set their offset and size. To do this, select the
whole text and right-click it.
|
||||||||||||||||
| The offset
defines the vertical position of the superscript or subscript text from
the baseline of the text. The size defines the height of the superscript
or subscript text. Both values are expressed as a percentage of the font
size.
|
||||||||||||||||
| 13. Click Properties in
the menu that appears.
14. In the Properties dialog box, click the Text tab. 15. In the Options area, select the Back Field check box to align the texts.
16. Increase or decrease the values for the superscript and subscript texts in the Offset and Size fields to set the offset and size. 17. Click OK to validate. The subscript and superscript texts are now aligned and set as defined.
|
||||||||||||||||
| This functionality does not always work when the text is wrapped. | ||||||||||||||||
|
||||||||||||||||


