Editing Dimension Tolerance Properties
| This task explains how to access and, if needed, edit
dimension tolerance properties.
There are different types of tolerances: |
|||||
|
|||||
|
|||||
|
|||||
| Open the Brackets_views02.CATDrawing document. Create a diameter dimension, for example. | |||||
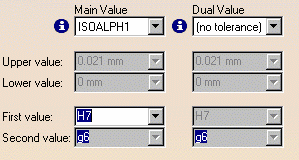
| 1. Select the diameter dimension. 2. Select the Edit-> Properties command and click the Tolerance tab. You can also right-click the dimension and then select the Properties command from the displayed contextual menu. 3. You can associate a tolerance to the selected dimension. In this example, choose ISOALPH1 in the Main Value field. The First value field is enabled and displays an alphanumerical value. The corresponding numerical equivalents are displayed in the Upper value and Lower value fields. (These equivalents are defined by standards.)
|
|||||

|
|||||
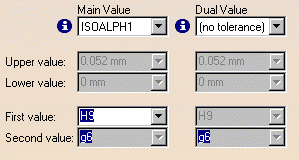
| 4.
Assign the desired tolerance to this dimension by selecting another
alphanumerical value. In this example, select H9 in the First value
field. The corresponding numerical numerical equivalents are
automatically displayed.
|
|||||

|
|||||
| 5. In some cases, you may wish to display another tolerance. In this case, select a tolerance type in the Dual Value field. | |||||
| If you choose the same tolerance
type for main and for dual value, then the values for this tolerance will
also be the same.
|
|||||
| 6. Click OK. | |||||
For dimensions with alphanumerical tolerances, you can display the corresponding numerical equivalents in the drawing, simply by placing the cursor over the dimension value in the drawing. The numerical equivalents are displayed in a tooltip. |
|||||
|
|||||
