 |
This
task explains how to define a new three-axis system locally. There are two
ways of defining it: either by selecting geometry or by entering
coordinates. |
 |
Open the PowerCopyStart1.CATPart
document.
|
 |
-
Select the Insert
-> Axis System command or click the Axis System
icon  . .
The Axis System Definition dialog box is displayed.
|
 |
 |
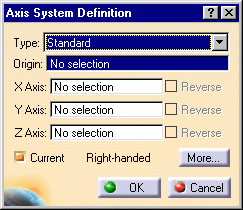
An axis system is composed of an origin point and
three orthogonal axes.
It can be right or left-handed.
This information is displayed within the Axis System Definition dialog
box.
You can choose from different types of axis system: |
|
 | Standard: defined by a point of origin and three orthogonal
directions (by default the current directions of the compass) |
Here only the point was selected and nothing specified for the axes.
|
 |
|
| Axis rotation: defined as a standard axis system and a angle
computed from a selected reference |
Here the Y axis was set to the standard axis system Y axis, and a 15
degrees angle was set in relation to an edge parallel to the X axis.
|
 |
|
| Euler angles: defined by three angle values computed from the
initial X, Y, and Z directions |
Here, the Angle 2 and Angle 3 were set to 30
degrees.
|
 |
|
-
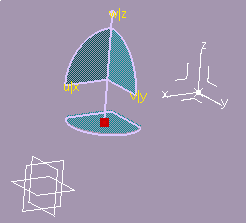
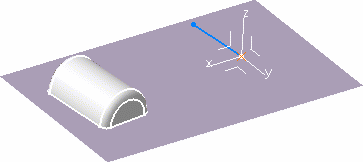
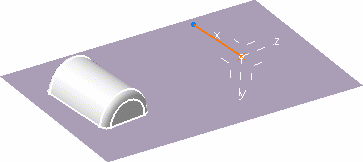
Select the point as shown to position the origin of the axis system you wish to
create. The application then computes the remaining coordinates. Both
computed axes are then parallel to those of the current system. The
axis system looks like this:
|
|
|
|
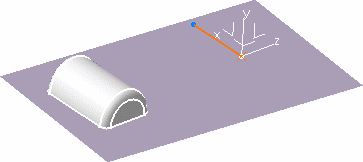
-
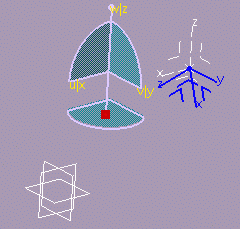
If you are not satisfied with x axis, for instance
click the X axis field and select a line to define a new direction for
x axis.
The x axis becomes colinear with this line.
|
|
|
 |
| It can be a line created
along the surface edge, for example, using the Create Line
contextual menu on the selection field, and selecting two surface
vertices.
Similarly you can create Points, and
Planes. |
| You can also select the Rotation contextual menu, and
enter an angle value in the X Axis Rotation dialog box. |
|
 |
|
-
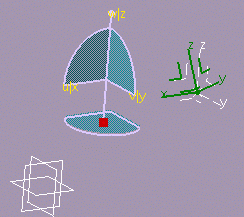
Click the y axis in the geometry to reverse it.
Checking the Reverse button next to the Y Axis
field reverses its direction too.
|
|

|
|
-
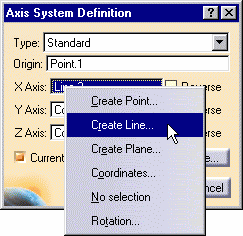
You can also define axes through coordinates.
Right-click the Z Axis field and select the Coordinates
contextual command. The Z Axis dialog box appears.
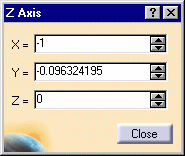
-
Key in X = -1, retain the Y and Z coordinates, and
click Close.
The axis system is modified accordingly, and is now left-handed.
|
|
|
|
|
-
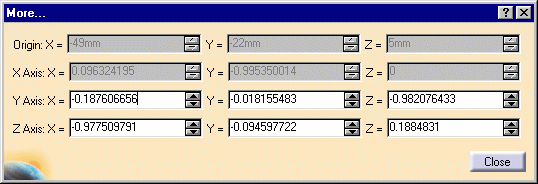
Click More to
display the More... dialog box.
The first rows contains the coordinates of the origin
point. The coordinates of X axis are displayed in the second row. The
coordinates of Y and Z axis are displayed in the third and fourth row
respectively.
|
|
|
|
As you are
defining your axis system, the application detects if its axes are
orthogonal or not. Inconsistencies are revealed via the Update diagnosis
dialog box. |
|
-
Uncheck the Current option if you do not want to set
your axis as the reference. The absolute axis at the bottom right of
the document then becomes the current three axis system.
|
|
-
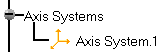
Click OK.
The axis system is
created. It is displayed in the specification tree.
When it is set as current, it is highlighted as shown aside. |
 |
|
Local axes
are fixed. If you wish to constrain them, you need to isolate them (using Isolate
contextual command) before setting constraints otherwise you would
obtain over-constrained systems. |
| |
The display mode of the axes is different depending on
whether the three-axis system is right-handed or left-handed and
current or not.
| THREE-AXIS
SYSTEM |
CURRENT |
AXIS
DISPLAY MODE |
| right-handed |
yes |
solid |
| right-handed |
no |
dashed |
| left-handed |
yes |
dotted |
| left-handed |
no |
dot-dashed |
|
| |
Right-click
Axis System.1 from the specification tree and select the Axis
System.1 object -> Set as current contextual command. Axis
System.1 is now current. You can then select one of its plane, to define a
sketch plane for example. |
|
Editing
an Axis System
You can edit your axis system by double-clicking it and entering new
values in the dialog box that appears. You can also use the compass to
edit your axis system.
Note that editing the geometrical elements selected for defining
the axes or the origin point affects the definition of the axis system
accordingly.
Right-clicking Axis System.Xobject in the specification tree lets you
access the following contextual commands:
| Definition...:redefines the axis system |
| Isolate: sets the axis system apart from the geometry |
| Set as Current/Set as not Current: defines whether the axis system
is the reference or not. |
|

|