Keeping and Removing Faces
![]()
| The Remove Lump command lets you reshape a body by removing material. To remove material, either you specify the faces you wish to remove or conversely, the faces you wish to keep. In some cases, you need to specify both the faces to remove and the faces to keep. | |||
| Using this command is a good way to get rid of cavities you inadvertently created. | |||
| This task illustrates how to reshape a body by removing the faces you do not need. Depending on the faces you select for removal, you will obtain two distinct bodies. | |||
| Open the RemoveLump1.CATPart document. | |||
| 1. |
Select the body you wish to reshape, that is Part Body. |
||
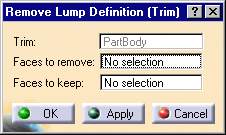
| 2. | Click the Remove Lump
icon The Remove Lump dialog box appears. The application prompts you to specify the faces you wish to remove as well as the faces you need to keep. |
||
|
|
 |
||
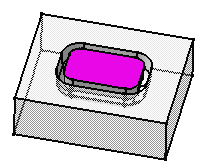
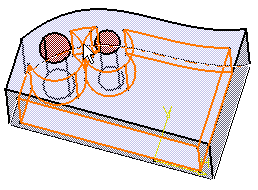
| 3. | Click the Faces to remove field and
select the colored face.
The selected face appears in pink, meaning that it will be removed during the operation. |
 |
|
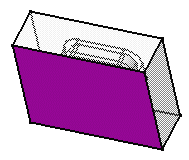
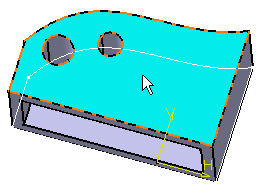
| 4. | Click OK.
The new body looks like this : |
 |
|
| 5.
6.
|
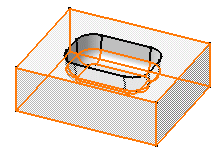
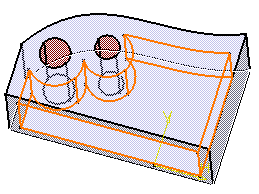
Now, delete Trim.1 in the specification tree and repeat steps 1 and 2. In the dialog box that appears, click the Faces to remove field and select the bottom face. This face appears in pink. |
 |
|
|
The faces selected as the faces to be kept are displayed in blue. |
|||
| 7. |
Click OK. The new body looks like this : |
||
 |
|||
|
You cannot re-apply Assemble, Add, Trim, Intersect, Remove and Remove Lump commands to bodies already associated to other bodies. However, if you copy and paste the result of such operations elsewhere in the tree you can then use these commands. |
|||
Cavities |
|||
|
The Remove Lump command allows you to delete cavities, which is a good way to control the quality of the part. As shown in the example below, the initial part includes a cavity resulting from a shell operation. |
|||
 |
|||
|
Applying the Remove Lump command and selecting the face to be kept... |
|||
 |
|||
|
reshapes the part. CATIA has removed the faces that are not adjacent to the selected face. |
|||
 |
|||
|
|
|||